Friday, November 30, 2007

Mrs. Eder's Toffee Bars


Once upon a time, when I was just a little girl, my mother taught piano. OK, I was not a little girl, I was a fat obnoxious teenager, but that's not really important. My mother was a piano teacher of little children and at Christmastime she would get all sorts of interesting presents. Actually her most interesting present happened at Easter, one of her students gave her one of those elaborately decorated Eastern European Easter eggs. It was beautiful. It also was a real egg. It exploded with a loud pop after a little more than a week. Very exciting.

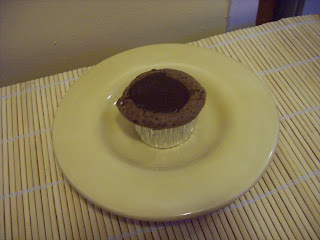
Anyhow, she would get lots of presents and plates of cookies and stuff like that. Scarves with piano keyboards on them and so on. It was one of those Christmases that we became aware of the most delicious and easy to make bar cookie ever. I mean it. EVER. Mrs. Eder sent over a plate of them with her kid and they were quickly inhaled by all of us kids. Mrs. Eder was kind enough to share the recipe with my mom and they have been a staple at Christmastime ever since.

It should be mentioned that there is one small trick. The cookies must be cut while warm. Otherwise they make a lovely ice cream topping. They don't have to be hot, just don't let them cool all the way down.

This recipe is so easy because the chocolate chips melt on their own after you sprinkle them on top. There's no need to pull out the double boiler or risk the microwave to melt them. Also, the original recipe calls for pecans and that's how I usually make them, but I've made them with walnuts before and they were still delicious. I'm pretty sure they'd be great with almonds too. Peanuts might be icky though.


I don't know what ever happened to Mrs. Eder. My mom switched careers and became an electrical engineer next. I don't think they kept in touch. But wherever she is, my family loves her. And these cookies!

Mrs. Eder's Toffee Bars
2 sticks butter
1 cup brown sugar
1 tsp vanilla
1 egg yolk
2 cups flour
1 bag chocolate chips (12 oz.)
3/4 cup chopped pecans

Mix sugar and butter. Add egg yolk and vanilla. Beat well. Mix in flour. Grease pan (cookie sheet with sides). Pat in dough.

bake at 325° 1/2 hour

Spread chocolate chips on cookie, let melt. Smooth and sprinkle with nuts. Cut while warm.

These freeze well.

Thursday, November 29, 2007

Baking with Grandma


My grandma, the one who cooked dinner to death, was a fabulous baker. She was also brilliant and scientific and completely unusual for a woman her age. She even had a Master's Degree in Math from Harvard. Technically she went to Radcliffe (the women's school), but from my understanding Radcliffe didn't have a math program, and her diploma says Harvard. Anyhow, Grandma taught me how to bake. Grandma is probably the reason I passed Organic Chemistry lab. She taught me how to measure precisely.

For example, I am simply unable to measure flour now without carefully scooping it into the measuring cup with a spoon and then leveling it off with a knife. I just know if I were to scoop in the measuring cup into the flour container it would pack in and I would get more than exactly the amount needed. And if I don't level it off with a knife then it won't be exact. I may let my OCD tendencies run wild while baking.

Grandma also showed me neat things like measuring butter by displacement. First you fill a 4 cup Pyrex measuring cup about half full with water. It doesn't really matter how full with water as long as there's more than the amount you want to measure. Make sure you know how much water is in the measuring cup and then add the butter, or oleo, or Crisco, until the water in the measuring cup reaches however much butter you want more in the cup. For example if you start with 1 cup of water and you want 1/2 cup of butter then you scoop the butter in until the water level hits 1 1/2 cups. It's pretty easy and an interesting way to teach kids about physical properties of fluid dynamics. (it's the only way I would understand something like that.)

Grandma also let us do something forbidden in my mom's house. She let us lick the beaters. Mom would yell about salmonella, but Grandma licked the beaters. I had no idea about licking beaters or tasting batter before Grandma let me bake cookies at the cottage.

Grandma also taught me to let my cookies cool on cut up paper bags. Call me crazy, but cooling the cookies on paper bags does something special to them. This year, I've been using cloth bags for groceries, so I don't have the overabundance of paper grocery bags I usually have at Christmas. I also have a limited amount of counter space, and these really cool stacking cooling racks. So for the first time since I started, the Christmas cookies will be air cooled on racks.

Grandma died at the ripe old age of 91 the summer before I met my husband. I'm grateful that she showed me how to bake and I think of her every time I pull out my trusty kitchen aid mixer.

Wednesday, November 28, 2007

Tahini cookies?

So I was leafing through my latest Cooking Light magazine to see what they had, and I had the TV going in the background, and the Brain was going on about something, and I was a little distracted that I haven't started my holiday baking yet and I normally start with a bang right after Thanksgiving and what was wrong with me and so on and so forth. Suddenly these cookies hopped right off the page at me. They sound unassuming just plain old Crunchy Sesame Cookies, the picture is not terribly exciting. Just a crunchy looking cookie. But as I scanned the ingredients I noticed they are made with Tahini! Leaping off the couch I gasped, "I have to make these!" Umm OK, maybe that didn't happen, but the Brain, noticed I wasn't even pretending to pay attention anymore.

I may have mentioned my love of Tahini in my first post here. Tahini isn't really all that low calorie, so I was stunned to find it in Cooking Light of all places. Cooking Light also has some really good dinner recipes, but I find they try so hard to cut the fat on cookies that they typically aren't very good. So to sum up, I had to bake these, but I wasn't expecting much. BOY was I wrong! These were delicious. They weren't all that crunchy. They were soft and chewy even the next day. And they had just the slightest touch of sesame to them, not overpowering at all.

The Brain, who typically categorizes things as, It's good, or It's OK, or Can I have some more, didn't say a lot. I'm not worried though. Those are his fingers in the photo.

Crunchy Sesame Cookies
Cooking Light

1 1/2 cups all purpose flour
1 1/2 Tbsp cornstarch
1 tsp baking powder
1/2 tsp baking soda
1/4 tsp salt
1 cup packed brown sugar
1/3 cup tahini
2 Tbsp dark sesame oil
1 Tbsp light-colored corn syrup
2 tsp vanilla extract
1 large egg
2 Tbsp granulated sugar

Preheat oven to 375°. Lightly spoon flour into dry measuring cups; level with a knife. Combine flour, cornstarch, baking powder, baking soda, and salt, stirring with a whisk; set mixture aside.

Place brown sugar, tahini, and oil in a large bowl; beat with a mixer at medium speed until well blended. Add syrup, vanilla, and egg; beat well. Gradually add flour mixture to sugar mixture, beating at low speed just until combined.

Lightly coat hands with cooking spray. Shape dough into 36 balls (about 1 inch each). Place granulated sugar in shallow bowl. Roll dough balls in granulated sugar; place 2 inches apart on baking sheets lined with parchment paper. Flatten balls with the bottom of a glass. Bake at 375° for 10 minutes or until lightly browned. Cool on pans 2 minutes. Remove cookies from pans; cool completely on a wire rack.

Tuesday, November 27, 2007

Thank God for Pork


I don't have the words to describe how good this Pork Tenderloin with Cider Jus and Rutabaga Puree is. The picture definitely doesn't do it justice. I admit that I picked the recipe because I like apple cider and rutabaga. To be honest I was intrigued on whether rutabaga would make the transition from humble root vegetable to something fancy. I in no way expected the delicious yumminess that was this dinner.

I wish I had more friends out here in nowhere land that I could invite over for a dinner party so that I could serve this again. The smooth earthiness of the rutabaga. The silky richness of the sauce. The smokiness of the pork. I'm so glad I went outside and barbecued the pork. Each element of the dish was just right and the dish on a whole was unbelievable. The Brain, who didn't want to wait for dinner and had a turkey sandwich instead, watched speechless as I licked my plate. I honest to God licked my plate. I may not have the best table manners, but that's not something I've ever done before.


I feel like making speeches and blowing kisses after eating this. I'd like to thank the pig that died and gave me it's tenderloin. I'd like to thank the farmers for growing the rutabaga and apples for cider. I'd like to thank my mother in law, who managed to find star anise in Amish country. I'd like to have another helping.

Pork Tenderloin With Cider Jus and Rutabaga Puree

2 cups apple cider
1 cup low-salt chicken broth
3/4 cup chopped onion
6 whole allspice
3 whole star anise
3 large fresh thyme sprigs
2 cinnamon sticks
2 tsp apple cider vinegar
1 bay leaf
5 Tbsp unsalted butter, cut into 1/2 inch cubes

Rutabaga Puree (recipe follows)

2 (12 oz) pork tenderloins, well trimmed
olive oil

Make Rutabaga Puree first.

Mix first 9 ingredients in heavy medium saucepan (apple cider through bay leaf). Boil until mixture is reduced to 1 1/2 cups, about 20 minutes. Strain, pressing on solids to extract liquid. Discard solids. Return liquid to saucepan and boil until reduced to 1/2 cup, about 3 minutes. Whisk in butter a few pieces at a time. Season with salt and pepper.

Meanwhile prepare barbecue (medium high heat)

Brush pork with olive oil. Sprinkle generously with salt and pepper. Grill until instant-read thermometer inserted into center of pork registers 145°F, turning frequently, about 20 minutes. Let pork rest 5 minutes (temperature will increase to 150°F). Thinly slice pork crosswise.

Divide pork slices among 6 plates.
Spoon Rutabaga Puree alongside. Drizzle sauce over pork and serve.

Rutabaga Puree

3 pound rutabaga, peeled and cut into 1 inch chunks
3 Tbsp butter

Cook rutabagas in large pot of boiling salted water until very tender, about 45 minutes. Drain well. Transfer to processor; puree until smooth. Return to pot. Stir over medium heat until any excess liquid evaporates. Add butter; stir until melted. Season with salt and pepper. (Can be made 2 hours ahead. Let stand uncovered at room temperature. Rewarm over medium heat, stirring often.)

Monday, November 26, 2007

Just Like Grandma Used to Make

It's Monday night again. And again the dilemma of what to make for dinner that would be ready between getting off work and Spin class. Again the idea of the crock pot comes to mind. Somewhat bolstered by last Monday's attempt, I decided to give it another shot.

According to The Joy of Cooking, a general rule of thumb is "estimate 2 hours on low or 1 hour on high in a slow cooker for every 30 minutes of cooking time in the original recipe." SO, not finding any really interesting recipes that didn't contain a can of cream of mushroom soup (the stuff is fairly unnatural) or a lot of sour cream, I tried to think of recipes that have long cooking times. I tried to think of foods that were cooked to death.

As an aside, the Brain has requested a reprieve from soup. So although I love soup and I'm fairly sure that chili would work in the slow cooker, I won't be making soup until January.

The number one food cooked to death in my mind is Pot Roast.

Now my mother cooked Pot Roast to death, but she sort of mummified it. Don't get me wrong, my mother can make all sorts of yummy and delicious things. She makes a Rice Bavarian that us kids fight over. Her fruitcake is eaten straight from the freezer. For birthdays, when we could choose what we wanted for dinner, 5 times a year she would roll out ravioli from scratch. My brother #3's birthday is 2 days before mine so she wouldn't make ravioli twice in two days. In the '70s she would throw elaborate dinner parties, serving Fondue, Chinese Food, and Chicken Cordon Blue. But my mother cannot cook Pot Roast. She sort of fried it for a couple hours and then used the electric carving knife to cut it into chunks. The potatoes and carrots were delicious and caramelized, but us kids nicknamed the Pot Roast "Hockey Puck Pot Roast".

It wasn't until after I'd moved out and after my dad's mom died that I realized that the delicious meat chunks floating in gravy that Grandma cooked were also Pot Roast. My Grandma was a terrific woman. She spoke with a New England accent so that when we'd be at her cottage on Lake Huron she's say things like, "the lake is cahm today." Grandma had infinite patience with me, she kept a vat of Noxzema to cover my sunburns, she brilliantly answered every question I ever had, and she really wasn't the best cook. [She could definitely bake chocolate chip cookies, but I'll save that story for another day.] She overcooked most of her vegetables and sometimes mixed them with mashed potatoes. She stuffed her turkey with ground beef. But, somehow, cooking the living daylights out of Pot Roast really worked. So I followed her example.

This morning I put the Pot Roast in the crock pot, set the timer for 8 hours, and hoped. It fell apart. There was too much gravy. It was EXACTLY like Grandma's! Well, Grandma used a packet and a half of French Onion Soup mix, but that's just a little too icky for me. I'm not a huge fan of processed food. So I shredded the meat and made half the cooking liquid into gravy, mixed it together and went off to spin. I got home and made some mashed potatoes as the Brain walked in and for once, the slow cooker worked it's magic for us.

Now I just need to think of another food that's cooked to death for next week...


Pot Roast
original recipe by Me (inspired by Grandma, Elizabeth Flint Uicker)

1 tsp olive oil
1 (3-pound) boneless chuck roast
1 tsp salt
1 tsp pepper
1 large onion sliced
1 cup red wine
4 garlic cloves minced
4 cups beef broth*
1 bay leaf
2 tsp flour
1 cup water

Drizzle olive oil in large skillet. Sprinkle chuck roast with salt and pepper and sear on all sides. Place chuck roast in crock pot. Place sliced onions and minced garlic on top of roast. Pour in wine and broth. Add bay leaf. Cook on low for 8 hours. Pull roast apart. Pour cooking liquids into saucepan and bring to a boil. Reduce by half. Mix water and flour in small bowl and add to cooking juices to make gravy. Add roast to gravy and serve over mashed potatoes.

* Next time I would definitely reduce this to 2 cups.

Sunday, November 25, 2007

My delicious oops


Sometimes all I want is something creamy and chocolaty. Ice cream usually hits the spot, but tonight, armed with my brand new chocolate cookbook, The Essence of Chocolate by John Scharffenberger and Robert Steinberg, I made chocolate pudding. Well sort of. I tried to make chocolate pudding.

Blame it on my eagerness. Blame it on pure impatience. Blame it on my need for semi instant gratification. I just couldn't wait any longer to add the chocolate to the milk and cornstarch mixture. In my defense, the recipe does say it should coat the spoon in about 15 to 20 minutes and I waited about 35. But I also don't own a double boiler and was working with a glass bowl on top a saucepan.

My resulting creation just hasn't firmed up. It's a lot thicker than chocolate milk, but there's really no need for a spoon. It may be more soup than pudding, but oh my goodness is it delicious. And, oh joy! The love of my life doesn't like chocolate! (that and he has a small problem with milk). So my mistake is mine to savor. I'm sure if I had waited for the cornstarch and milk mixture to thicken the pudding would be even more delicious, but for now I'm happy and I'll try again some other time I'm craving something smooth and chocolaty.


Silky Chocolate Pudding
The Essence of Chocolate by John Scharffenberger and Robert Steinberg

1/4 cup cornstarch
1/2 cup granulated sugar
1/8 tsp salt
3 cups whole milk
6 ounces 62% semisweet chocolate coarsely chopped
1 tsp pure vanilla extract

Combine the cornstarch, sugar, and salt in the top of a double boiler. Slowly whisk in the milk, scraping the bottom and sides with a heatproof spatula to incorporate the dry ingredients. Place over gently simmering water and stir occasionally, scraping the bottom and sides. Use a whisk as necessary should lumps begin to form. After 15 to 20 minutes, when the mixture begins to thicken and coats the back of the spoon, add the chocolate. Continue stirring for about 2 to 4 minutes, or until the pudding is smooth and thickened. Remove from the heat and stir in vanilla.

Strain through fine-mesh strainer into a serving bowl or strain the pudding into a large measuring cup with a spout and pour into individual serving dishes.

Some find the layer of "skin" that forms on the top of pudding after refrigerating to be the best part, while others can't bear the though of it. If you're the type who dislikes a pudding skin, place plastic wrap on top of the pudding and smooth it gently against the surface; the wrap will keep a skin from forming. But if you want that dense, chewy layer to form, just pull plastic wrap tightly over the top of the serving dish(es) and don't allow it to touch the pudding.

Refrigerate for at least 30 minutes or up to 3 days.

Saturday, November 24, 2007

Cracked Pepper Biscuits

So what to do with turkey leftovers has been rehashed one thousand times over and you won't find some turkey / cranberry enchilada recipe on my blog. My personal favorite is to just eat the turkey on white bread with Miracle Whip. A nice, plain beige sandwich. It's the only time of the year that I buy plain, white bread or Miracle Whip. And I love those turkey sandwiches so much that I roasted a turkey breast just so we could have them. I come from a big family and married into a medium, growing into big, family, so leftovers are never really a problem anyhow.

But I'll gladly take a turkey carcass off your hands. Those turkey bones and bits and pieces left stuck to them are a flavor goldmine for making turkey stock and from that turkey soup. Now everyone knows how to boil the carcass for 3 hours with an onion, a bay leaf, some carrots, celery and parsley. And then strain it and add some noodles. The question then becomes how do you take your simple turkey soup and turn it into a meal?


Cracked Pepper Biscuits, that's how! These biscuits are really easy. They are light and flaky and buttery and just melt when you take a bite. The black pepper shines through and makes these have a little zip. They're not the kind of biscuits to eat with jam, that's for sure! There aren't any complicated ingredients either. I even put my coat on, went outside and found that my thyme plant is still alive and kicking despite the chilly weather of late. The only problem with them is that I keep eating them and the soup isn't done.

Cracked Pepper Biscuits
from the Bon Appetit Cookbook

2 Tbsp unsalted butter
2 Tbsp chopped fresh thyme
1/2 tsp coarsely cracked black pepper
1/2 cup whole milk
1 large egg
2 cups unbleached flour
1 Tbsp baking powder
1 tsp salt
3/4 cup chilled unsalted butter cut into 1/2 inch cubes

Preheat oven to 475°F. Melt 2 Tbsp butter in heavy small skillet over medium heat. Add thyme and cracked black pepper. Saute until fragrant, about 2 minutes. Transfer thyme mixture to small bowl. Whisk in milk, then egg. Chill until mixture is cold.

Blend flour, baking powder, and salt in processor 10 seconds. Add 3/4 cup chilled butter. Using on/off turns, process until mixture resembles coarse meal. Add milk mixture. Using on/off turns, process just until moist clumps form. Transfer dough to floured work surface. Knead just until dough holds together, about 6 turns. Roll out dough to 1/2 inch thickness. Using 2 inch biscuit cutter, cut out biscuits. Reroll dough scraps and cut out additional biscuits, until all the dough is used.* Transfer biscuits to large ungreased baking sheet.

Bake until golden brown, about 12 minutes. (Can be prepared 6 hours ahead. Cool completely. Wrap in aluminum foil and store at room temperature. Before serving rewarm unwrapped biscuits in 350°F oven just until heated through, about 8 minutes.) Serve warm.

I got 20 biscuits. The cookbook says it makes 16 and the recipe on Epicurious says it makes 12.

Friday, November 23, 2007

Leftovers and Shopping

So my Friday morning Spin class got moved to Wednesday because everyone else wanted to shop. Thus, I had no excuse not to go shopping this morning. Yikes. People are crazy. I discovered that hanging out waiting in line while everyone else shopped was my best coping strategy and ended up pretty unscathed. I did get some nice loot though. Unfortunately, I did not get any batteries, so today's post has no pictures.

In the tradition of the day after Thanksgiving, I also had leftovers for lunch. I had the Moroccan Stew over pasta because I didn't cook dinner yesterday and so I have no turkey. Well, that's kind of a white lie. I have a turkey breast in the oven now. I pushed about 3 Tbsp of butter with 1 Tbsp chopped fresh sage and 2 Tbsp chopped fresh parsley under the skin and salted and peppered it inside and out. Hopefully it will be tasty, but it looks like I'll have to wait 'till later to eat my turkey sandwiches.

And now for a nap...

Thursday, November 22, 2007

Happy Thanksgiving!


It's finally here! I love Thanksgiving! This year we are going to the Brain's parents house for dinner. Actually, we are supposed to leave in minutes, so I will be brief. My job this year is rolls. The Brain's sister's kids really like crescent rolls rolled around marshmallows. But I made something for the adults. These are Poppy Seed Dinner Rolls from Bon Appetit. I sprinkled half with poppy seeds and the other half with sesame seeds. Of course I used the blog as an excuse to try one and they're pretty tasty!


Today I'm thankful for a loving husband, a roof over my head, and good food like this when so many people in the world are hungry for food, love and shelter.


Poppy Seed Dinner Rolls

1 cup warm water (105°-115°F)
2 envelopes dry yeast
1/4 tsp plus 1/3 cup sugar
2/3 cup whole milk at room temperature
1 large egg
2 1/2 tsp salt
1/4 cup (1/2 stick) butter melted and cooled
5 1/3 cups (about) all purpose flour
1 cup (2 sticks) chilled unsalted butter cut into thin slices
1 egg beaten with 1 Tbsp cold water
poppy seeds (and sesame seeds)

Place warm water in large bowl. Sprinkle with yeast and 1/4 tsp sugar over and stir to blend. Let stand until yeast dissolves and mixture is slightly foamy, about 8 minutes.

Whisk milk, 1 egg, salt, and remaining 1/3 cup sugar into yeast mixture.

Add melted butter and whisk until smooth. Add 1 cup flour and mix until smooth. Combine 4 cups flour and 1 cup chilled butter in processor* . Using on / off turns, process until mixture resembles coarse meal. Add to yeast mixture and stir until dry ingredients are moistened. Knead in bowl until smooth dough forms, adding more flour if dough is sticky**, about 5 minutes.

Cover bowl and refrigerate overnight. ***

Butter 24 muffin cups.

Turn dough out onto floured surface; knead briefly until smooth and elastic, about 3 minutes. Divide dough into 4 equal portions. Place 1 dough portion on work surface; cover and chill remaining dough. Roll out 1 dough portion on floured surface to 13x11 inch rectangle (about 1/8 inch thick). Cut rectangle lengthwise into 6 strips, each scant 2 inches wide. Stack strips atop one another, forming 6 layers and pressing slightly to adhere. Cut strips crosswise into 6 equal stacks, each about 2 inches long. Place 1 dough stack, 1 cut side down, into each muffin cup (dough will fan out slightly and fill muffin cups as dough rises). Repeat with remaining chilled dough pieces.

Cover rolls with kitchen towel.

Let rise in warm draft-free area until rolls are puffed and doubled in volume, about 1 hour and 15 minutes.

Position 1 rack in center and 1 rack in top third of oven; preheat to 350°F.

Brush rolls gently with egg glaze. Sprinkle with poppy seeds. Bake until rolls are golden brown, switching top and bottom baking sheets halfway through baking, about 25 minutes.**** Transfer pans to rack and cool rolls 5 minutes. Remove rolls from pans and cool on racks. Serve warm or at room temperature. (Can be prepared 1 week ahead. Wrap in aluminum foil and freeze. If desired, rewarm thawed wrapped rolls in 350°F oven for about 10 minutes.)

* I did two batches in the food processor because mine is small. One batch was 2 cups flour and 1 stick of butter.

** My dough was crazy sticky so I had to add a LOT of flour. It could have something to do with the rain and humidity yesterday.

*** Yeah, there's no room for that big bowl in my fridge so I left it on the counter overnight.

**** I put my muffin pans right next to each other, but my oven heats unevenly so I still rotated halfway through.

Wednesday, November 21, 2007

Maple Pumpkin Dressing


Continuing on in the theme of trying to interject some healthy into a week of gluttony, may I present a delicious fall salad dressing. Finding a new use for my fancy pumpkin seed oil that my very nice mother-in-law brought back from Austria, I made Maple Pumpkin Dressing. Unfortunately, I was expecting a little more maple and the soy sauce was a little overpowering, but overall it was great on a salad of Romaine hearts, mushrooms, green onions, dried cranberries and sunflower seeds.

The recipe is from my Pumpkin cookbook again. The dressing is really good for fall too. It's not all light and summery, and yet it's not super heavy. It pretty much hit the spot.

Maple Pumpkin Dressing

2 Tbsp cider vinegar
2 Tbsp pure maple syrup
2 Tbsp soy sauce
1 Tbsp minced shallots
1 clove garlic, minced
1 tsp Dijon mustard
1/4 tsp salt
1/2 cup olive oil
1/4 cup pumpkin seed oil

Mix the vinegar, maple syrup, soy sauce, shallots, garlic, mustard, and salt together in a small bowl. Slowly drizzle olive oil into the bowl, whisking constantly. Do the same with the pumpkin seed oil. This makes about 1 cup. Store what is left in a glass jar or bottle for several weeks in the refrigerator.

Tuesday, November 20, 2007

And now for something completely different

While at the grocery store this weekend, I stalked the fruit aisle, looking for my next victim, I mean attempt at finding a fruit I like. After a couple drive-bys with my cart, looking at all the fruit I don't like, starfruit, kiwi, mangoes, strawberries. And the fruit I'm just unwilling to try just yet, papaya, persimmon. And the fruit I wouldn't mind trying, but I just don't know how like quinces. Quinces smell great, but I'm pretty sure you can't eat them raw. Anyhow, after spending much more time in the grocery store than necessary, looking like a fruit stalker, I decided to head for vegetables instead.


This week is your standard week of gluttony so I decided to go healthy. Of course, there's the old formula, vegetables = healthy. However there's a difference between iceberg lettuce and turnip greens. Iceberg lettuce is pretty much nutritionally decrepit. Turnip greens on the other hand are crazy healthy. They're high in Vitamins A, C, E, B6, Folate, Copper, Calcium, and dietary fiber. They're like my little spot of healthy in a week of mashed potatoes and sweet potatoes and marshmallows and pie. OK I'm totally busted again, I really don't like pie. It's kind of a double whammy, fruit and crust. Bleh. I do however like pumpkin pie filling and whipped cream. So the plate with just an entire piece of bottom crust on it is usually mine.

SO turnip greens provide one little point in the week where I can feel like I'm not slowly turning into Jaba the Hut. Well that and my Friday morning Spin class got moved to tomorrow morning so everyone else can go shopping, and I had to sign up for a Friday morning step class. So thank you Alton Brown for this delicious turnip green recipe, corny name aside.

Vlad's Very Garlicky Greens
Alton Brown

5 to 7 cloves garlic peeled
one clove garlic sliced
one clove garlic minced
enough olive oil to cover the bottom of a wide saute pan
1 bag turnip greens, cleaned and roughly shredded
salt and freshly grown pepper

Place saute pan over medium heat and then lightly crush the whole garlic cloves. When the pan is hot, add just enough oil to cover the bottom of the pan and add the garlic. Cook, stirring frequently until golden brown (3 to 5 minutes). Remove from the oil.

Thinly sliver the sliced garlic clove and add it to the pan stirring constantly. Once the slivers turn golden, add the greens and toss to coat with hot oil. Season with salt and pepper as soon as the greens start to wilt. Add the minced garlic during the last 30 seconds of cooking and toss the greens to distribute. Keep the pan and the greens moving constantly, if you can.

Serve as a side dish or toss with pasta and serve as a main course.

Monday, November 19, 2007

Maybe


This morning in an attempt, yet again, to have a nice filling home cooked meal between coming home from work and going to that Monday night spin class, I pulled out the crock pot. The Brain's first response on his way to the shower was, "Oh are we having pizza tonight?" I told him maybe.

This latest attempt at crock-potting involved a Boston butt. (Isn't that the greatest name for a cut of pork?) Anyhow, this is another Cooking Light recipe and I checked out the reviews before making it. A lot of people liked it, and the ones that didn't thought it was bland. So I doubled up on the garlic, added some ground black pepper, some beef broth, and a 1/2 teaspoon of smoked paprika. When I finally got home I was eager to find out if I was having Slow-Cooked Tuscan Pork with White Beans, or if we were indeed ordering pizza. The result?

It was OK.

It smelled good. I was excited to see the pork literally falling apart in the pan. The beans were soft and almost creamy. But it tasted kind of beige. Well the garlic and the salt came through, but it needs a kick. I'm not sure exactly what kind of kick it needs though. As I'll be eating plenty of leftovers of it, I may try adding a swirl of balsamic vinegar. I know vinegar always helps a navy bean soup. Or I might try sprinkling in some cayenne pepper for a little heat. Maybe I'll get lucky and it'll get great overnight in the fridge.

Crock pot 2 Me 0.

Slow-Cooked Tuscan Pork with White Beans

1 (1 pound) bag dried navy beans
1 Tbsp minced fresh sage
2 tsp kosher salt
1 tsp ground fennel
16 cloves garlic, minced
21/2 pound boneless pork shoulder (Boston butt)
4 cups water
1 cup beef broth
2 bay leaves
1/2 tsp smoked paprika
a couple shakes of black pepper

Sort and wash navy beans and place in a large bowl. Cover with water to 2 inches above beans; Cover and let stand overnight.

Drain the beans and place in the crock pot. Place the Boston butt on top of the beans. Rub the herbs and seasonings and garlic into the pork. Pour on the water and broth. Cover and cook on low for 10 hours.

Sunday, November 18, 2007

Stew in Fall- What a match!

Today, the sun was shining and everyone on our street was outside raking leaves. It was a beautiful fall day. The kind of day that makes you wish that fall would last for most of the year. Clean, crisp, chilly. The kind of day that when you come inside you want something hearty and warm. A day you appreciate that "stick to your ribs" character of stew. I'm not talking about those days that are so cold the snot inside your nose freezes and you need chili, heavy on the jalapenos, to start to feel human again. Just a nice warming stew in fall.

Being that I've already shared my favorite fall stew here, I decided to try a new stew. This is Moroccan-Style Braised Beef with Carrots and Couscous from Cooking Light. After a week of Ice Cream Terrine and decadent Chocolate Cranberry Cupcakes, I'm really good with something from Cooking Light. I did think it would be more interesting with more vegetables in it and there definitely wasn't enough couscous for the amount of stew. But, the stew itself was good and I even liked the gravy. Normally I'm not such a fan of gravy, but this gravy is rich and thick and has some darn tasty undertones.

Moroccan-Style Braised Beef with Carrots and Couscous

Beef:
2 tsp olive oil
1 pound lean beef stew meat, cut into 1-inch cubes
1/2 tsp salt
1/4 tsp black pepper
3 medium onions thinly sliced
4 garlic cloves, chopped
2 tsp ground cumin
2 tsp ground turmeric
2 tsp paprika
1 tsp ground ginger
2 (14oz) cans less sodium beef broth
1/4 cup packed dried apricots
1/8 tsp salt
1/8 tsp black pepper
4 large carrots, peeled and cut on the diagonal
1/4 cup chopped fresh parsley

Couscous:
2 tsp olive oil
1 garlic clove, crushed
1/2 tsp salt
1/4 tsp ground turmeric
1/3 cup less sodium beef broth
1/3 cup water
2/3 cup uncooked whole wheat couscous
1/4 chopped green onions

Remaining Ingredient:
1/4 cup fresh parsley, divided

To prepare beef, heat 2 teaspoons oil in a large saucepan over medium high heat. Sprinkle beef with 1/4 tsp salt and 1/4 tsp pepper. Add beef to pan, and cook 4 minutes or until beef is browned on all sides, turning occasionally. Transfer beef to a bowl.

Add onions to pan; cook 10 minutes longer or until tender, stirring frequently. Add garlic cloves and next 4 ingredients (through ginger); cook 1 minute, stirring constantly. Add broth; bring to a boil. Add apricots; reduce heat, and simmer 5 minutes. Cover and cook over medium-low heat 30 minutes. Using an immersion blender in pan, puree onion mixture. Stir in 1/8 teaspoon salt and 1/8 teaspoon pepper.

Return beef to onion mixture; cook over medium-low heat 1 hour or until beef is tender. Add carrot to pan; cover and cook 15 minutes or until carrot is tender. Stir in 1/4 cup chopped parsley.

While beef cooks, prepare couscous. Heat 2 teaspoons oil in a small saucepan over medium heat. Add crushed garlic clove, 1/2 teaspoon salt, and 1/4 teaspoon turmeric. Stir in 1/3 cup broth and 1/3 cup water; bring to a boil. Gradually stir in couscous. Remove from heat. Cover and let stand 5 minutes; fluff with a fork. Stir in green onions.

Spoon couscous onto plates. Top evenly with beef stew, and sprinkle each serving with parsley.

Saturday, November 17, 2007

There's Always Next Year...


So. It should be known that the Brain likes Ohio State and I like U of M. This is a glaring facet of our marriage that we cannot agree on that comes back every year to haunt us. Every November there's buildup. A little countdown. He makes little comments. I retaliate with little comments. OK maybe I start it. Every year I hope against hope that the weenie in the sweater vest and his stoopid Buckeyes will have their arrogance handed to them on a plate. Every year, the Brain does his little happy dance. It's so depressing.

See, I am going to live in Ohio probably for the rest of my life ~ shudder. And like any good girl brought up in Michigan, I was taught to root for Michigan, or I could root for Michigan State, or really anyone in the Big 10, which really should be Big 11, with the mighty exception of Ohio State. Actually I'm not sure if I was taught that, or if there just comes a point when you notice that Ohio fans carry this Ohio State / Michigan football rivalry just a little too far. Like when you pull into a rest stop off I-94 in North Dakota and somebody gets out of their car with an Ohio license plate, sees the Michigan plate and starts yelling at you, "Oooooh yeah, Michigan Sucks!! Go Buckeyes!" In June. It's like ummmm. yeah. Get a life.

The funniest part about it is, before I moved to Ohio I didn't really care about whether Michigan beat the Buckeyes or not. Well with the exception of whether or not it would mean the Big 10 (11) Championship. The big game is the Michigan / Michigan State game.

So with the anticipation of maybe having a good game to watch and looking around for some quality tailgate food, I came across these oh so cute little pretzels at Smitten Kitchen. They take about two hours to make from start to finish. Maybe a little longer. But they're so delicious warm out of the oven. And they go really well with beer. and football.


But for crying out loud Jim Tressel needs to wear something a little more manly and rugged than a sweater vest. It's like we are being clobbered year after year by an accountant. (Not that there is anything wrong with accountants, they just don't seem to embody football that's all.)

Check out Smitten Kitchen's post for the recipe. I followed it pretty much word for word. Although my skill at rolling out my pretzels is nowhere close to hers.


In fact I had some that I don't really know what they look like.

Friday, November 16, 2007

Yay Pumpkin! Vote for me!


Ah look at those delicious curlicues of pasta coated with creamy pumpkin sauce. So tender. So yummy. But first, a shameless plea for votes, and a teeny rant.

OK, so you remember the super delicious Thanksgiving Ice Cream Terrine? How the flavors meld so deliciously into a medley of fall ice cream flavors? Well, the roundup is up at Running With Tweezers. She's got eleven terrines there. I think they all look pretty spectacular, but there's a prize involved and I'm a sucker for a prize. So I urge you to go there and vote for me! (I'll never go into politics, so this is the only place I'm going to tell people to vote for me. It's a little weird.)

Now on to my teeny rant. I am no longer able to buy ground lamb here. I could buy it last week. But now my local grocery tells me if I want ground lamb I have to buy an entire shoulder and then they'll grind it all and sell it to me. That's a load of hooey. (Meijer doesn't have it either here.) So I called one of the local custom butchers around town and they told me they didn't know where I could buy ground lamb by the pound. They said they would sell me a half a lamb if I found someone else to buy the other half. But I don't have a deep freezer. Shoot. And I seriously don't know anyone out here who wants half a lamb. Where are the Jewish people out here? Or the Hindus? Middle Easterners? Anyone who eats lamb? Well if they're here I don't think they're buying lamb either. How annoying. Maybe next year I'll buy one at the county fair and have it butchered. Or maybe I'll try to convince the Brain's parents to raise one on their property. OK I'm done with my rant

Now the delicious pasta. This was not my original plan for dinner. Originally I had planned a ground lamb and peas Indian dish. But because of the problem with the grocer, I was suddenly planless. I hate being planless. Let's just say I don't function so well planless. SO with no meat thawed and already posting about spaghetti this week I had to scramble for something else to cook. Stoopid Nablopomo. So I took a look around my pantry and cupboards and realized I had some heavy cream, a can of pumpkin, an onion, and fresh sage. My sage plant that I repotted is not looking like it's going to pull through, so harvesting sage is a good idea right now. As an update, the parsley plant however seems to be hanging in there, and the rosemary is smelling up the living room in a good way.

But I digress, in actuality I'm a food hoarder, so I have ridiculous amounts of things like dried beans and canned beans and pasta and tomato sauce and pickles and canned tomatoes, but it sounds better if I say oh look I just happened to only have exactly the ingredients I need on hand! Anyway, this pasta is pretty delicious and creamy.

Creamy Cavatappi, Sausage and Pumpkin

adapted from Pumpkin: A Super Food for All 12 Months of the Year

1 pound bulk sweet Italian sausage

1 medium onion thinly sliced
4 cloves garlic minced
1 bay leaf
2 Tbsp fresh sage, chopped
1 cup dry white wine
1 cup chicken broth
1 cup canned pumpkin
1/2 cup heavy cream
1/2 tsp nutmeg
1/2 tsp salt
freshly ground black pepper
1 pound Cavatappi
grated Parmesan to sprinkle on top

1) Cook the sausage over medium heat for approximately 5 minutes until it is no longer pink and the remove from the pan.

2) Saute the onions in the fat left from the sausage for 3 minutes or until softened. Add the garlic and cook for another 3 minutes, or until the onion and garlic are soft and beginning to brown.

3) Add the bay leaf, sage, and wine to the pan. Bring to a boil, then reduce the heat. Do not cover. Simmer and stir to scrape up the browned bits until the wine is reduced by half, about 5 minutes.

4) Whisk in the broth and pumpkin and bring to a low boil while stirring. Stir in the cream, add the sausage, and cook over low heat for several minutes. Add the nutmeg, salt, and pepper to taste. Adjust the seasonings, if necessary.

5) Meanwhile cook the pasta until al dente. Drain and add the pasta to the skillet. Toss the sauce and pasta together while cooking over low heat for 1 to 2 minutes. Sprinkle with Parmesan cheese.

Disclaimer:
OK so I adapted some things here. It is probably better for your heart if you follow the way the recipe originally is written and brown the sausage in olive oil then wipe out the pan after removing the sausage and saute the onion and garlic in more olive oil. But really c'mon people. Does this look like a low calorie, heart smart meal? Puh Lease. This is as fattening as I cook. But like I said in the heretofore mentioned rant, I went with what was in the cupboards.

Thursday, November 15, 2007

Chocolate Cranberry Cupcakes


Alright, I'm at it again. Quirky Cupcake has a monthly food event called Cupcake Hero. So every month there's a new theme. This month it's cranberry! Cranberries are actually on my list of fruit that's not too bad. How could I dislike a fruit that the way they figure out the best of the best is by bouncing it?

"At Ocean Spray we take a lot of pride in our cranberries. Only the best make it into our products. But how does one judge a cranberry? Well, we start by judging their color, size and freshness. And, surprisingly enough, by their ability to bounce. That's right. Bounce. You see, an early New Jersey grower, John "Peg-Leg" Webb, first noted this special property of the cranberry. Because of his wooden leg, he couldn't carry his berries down from the loft of his barn where he stored them. Instead, he'd pour them down the steps. He soon noticed that only the firmest and freshest berries bounced down to the bottom; the soft and bruised ones didn't make it. This led to the development of the first cranberry bounce board separator, a device we still use today, to remove damaged or sub-standard berries."

I didn't want to do your standard spice cake type cupcake, and I didn't want to just add dried cranberries to some average cupcake recipe. So I went fancy. The cupcake is chocolate Chambord cake with a cranberry puree filling and frosted with a chocolate ganache. It's rich. It's decadent. It is not the cupcake to eat at 7 o'clock in the morning. The ladies at Catholic Charities who were the happy recipients of a dozen of them gushed. The Brain was annoyed that I left with a dozen and didn't bring them into the office. These are cupcakes that are best served as dessert for dinner with a strong cup of coffee.

Chocolate Cranberry Cupcakes

Cake:
10 oz bittersweet chocolate, chopped
1 cup sugar
3/4 cup (1 1/2 sticks) butter room temperature
6 large eggs, separated
2 Tbsp Chambord
2 tsp vanilla
1/2 cup flour
1/4 tsp salt

Preheat oven to 350 degrees. Line cupcake pan with paper liners. Stir chocolate in metal bowl set over saucepan of simmering water until melted and smooth. Cool slightly. Using electric mixer, beat sugar and butter in large bowl 2 minutes. Beat in egg yolks, Chambord, and vanilla. Stir in cooled chocolate. Add flour and salt; stir to blend. Using clean dry beater, beat egg whites in another large bowl until stiff peaks form. Fold whites into chocolate mixture in 3 additions. Fill cupcakes papers 2/3 full. Bake for 20 minutes or until a toothpick inserted in the center comes out dry. The centers of the cupcakes will fall while cooling.

Cranberry puree filling

1 cup fresh cranberries
3/4 cup water
1/3 cup sugar
1 Tbsp Chambord

Bring cranberries water and sugar to a boil in saucepan over high heat, stirring until sugar dissolves. Reduce heat to medium; cook until cranberries burst, about 5 minutes. Transfer to blender; puree. Strain puree into bowl; discard seeds. Mix in Chambord. Cover; refrigerate at least 2 hours or overnight (sauce will thicken some).

Chocolate Ganache

7 ounces bittersweet chocolate, chopped
7 Tbsp butter, cut into 1-inch cubes, room temperature
2/3 cup whipping cream

Place chocolate and butter in medium metal bowl. Bring cream to boil in small saucepan. Pour hot cream over chocolate mixture; stir until mixture is melted and smooth.

To Assemble:

Once the cupcakes are cooled, fill a squirt bottle with cranberry puree. Insert tip of squirt bottle into center of cupcake and squeeze in about a teaspoon of puree. Spoon frosting into divot in center of cupcake and let cupcakes sit for 30 minutes to let ganache set.

Wednesday, November 14, 2007

Eh What's Up Doc?


I admit it. I'm the kind of girl who doesn't like to be caught without. When going away for a trip I always pack twice as many pairs of underpants as needed. Just in case. I have sticks of deodorant stashed in multiple places around the house. I even have an extra tube of toothpaste in my car. Unfortunately when it comes to carrots, you can have a little too many. While rummaging around trying to figure out what to make next, I came to believe that there is no logical reason for me to have 10 pounds of carrots in my fridge. Carrots are ridiculously high in beta-carotene and are great for your eyes, they lower cholesterol, and might prevent heart attacks and cancer. But what exactly do you do with 10 pounds of carrots? Or even a healthy chunk of them?


I made soup. Soup is the great equalizer of odds and ends of vegetables. I hunted around for a good carrot soup recipe. This was a little trickier than I thought because I just didn't feel like putting ginger or chillies or anything fancy in it. I wanted carrot soup that was warm and homey and nourishing. So I kinda sorta peeked at the recipe my mother-in-law had posted on her fridge; I would give credit except it's an old photocopy from some unknown cookbook. I added some things and took some things out. I don't personally see the need for heavy cream in a pureed soup very often. It tasted good. Comforting. Homemade. But it needed a garnish. Bear with me, garnishing soups is a pretty recent kick I've been on. Sprinkling it with dried cranberries set it off just right. The sweet tart of the cranberries balance nicely with the salty smoothness of the soup. Yum.


Carrot Soup

8 Tbsp (1 stick) of butter
15 carrots, peeled and sliced
2 stalks celery, chopped
1 onion, chopped
2 potatoes, peeled & diced
1/2 cup chopped parsley
6 cups chicken broth
salt and pepper to taste
Dried cranberries for garnishing

Melt the butter in a dutch oven over medium high heat, add the carrots, celery, and onion, and cook for 10 to 15 minutes, stirring from time to time. Add the potatoes and parsley and stir until coated. Stir in the stock and cook, covered, until the potatoes are tender, about 20 minutes. Puree with a hand blender or food processor. Return to the pot, add salt and pepper to taste and rewarm. Garnish with dried cranberries.

Tuesday, November 13, 2007

Moody me.


Do you ever just have a bad day for no reason? The kind of day where you really just want to come home and eat a bag of potato chips for dinner? Nothing really traumatic happened. My husband is great and helps with the laundry and did the dishes this weekend while I was out of town. My job, although not exactly mentally stimulating, still exposes me to new things and gives me a sense of accomplishment sometimes. But over the course of the day the happy little mood I woke up with went South and left me feeling like Lucy Van Pelt towards dinner time.

It was time to break out some yummy, not quite unhealthy comfort food. Butternut Squash and Orzo with Fresh Sage. This is the side dish (although really it could be a meal all by itself) that showed the Brain that squash isn't just okay, it's really really tasty.

I just happened to have a bunch of squash already peeled and cut in a Ziploc in the fridge so the hard part was done. A little sauteing of onion and garlic, mixing in some white wine (already the day starts to get better) and some chicken broth. By now I'm humming along, loving the smell of butter and wine and broth. Next in goes the squash and the smells are getting even better. As the squash cooks I bring some more broth to a boil and cook the orzo in it. Then drain the orzo, add it to the squash with some Parmesan and chopped up fresh sage. The timer on the baked chicken (we eat a lot of that) goes off and Voila! Even the dogs who are desperately trying to eat my dinner can't bother me.


And maybe today isn't so bad after all...


Butternut Squash with Orzo and Fresh Sage

3 Tbsp butter
1 cup chopped onion
1 garlic clove minced
1 2-pound butternut squash, peeled, halved, seeded, and cut into 1/2 inch cubes (about 4 cups)
4 cups low salt chicken broth divided
1/2 cup dry white wine
1 cup orzo
1/2 cup freshly grated Parmesan cheese
2 Tbsp chopped fresh sage

Melt butter in heavy large skillet over medium heat. Add onion and saute until softened, about 6 minutes. Add garlic and saute until fragrant, about 1 minute. Add squash cubes and stir to coat. Add 1/2 cup chicken broth and wine. Cover and simmer until squash is just tender and liquid is absorbed, about 10 minutes (if necessary, uncover and simmer until excess liquid evaporates.)
Meanwhile, bring remaining 3 1/2 cups broth to boil in heavy large saucepan. Add orzo. Boil uncovered until orzo is tender but still firm to bite, stirring occasionally, about 8 minutes. Drain orzo if necessary.

Transfer to large bowl. Stir in squash mixture, then Parmesan and sage. Season to taste with salt and pepper and serve.

Monday, November 12, 2007

Mmmm spaghetti


Spaghetti

Spaghetti, spaghetti, all over the place,

Up to my elbows - up to my face
Over the carpet and under the chairs,
Into the hammock and wound round the stairs
Filling the bathtub and covering the desk
Making the sofa a mad mushy mess.

The party is ruined, I'm terribly worried,
The guests have all left (unless they're all buried).
I told them "Bring presents." I said "Throw confetti."
I guess they heard wrong
'Cause they all threw spaghetti!
-Shel Silverstein


Yeah we love spaghetti. It's the perfect dinner when the Brain is working late and I'm running off to spin class. And I really don't think anyone needs a recipe for spaghetti. Especially because we just used the Meijer organic spaghetti sauce. Nothing to it. But what's that sticking out of the bowl of spaghetti? Why that's Zingerman's Parmesan Pepper bread, quite possibly my favorite bread of all time - big chunks of Parmesan baked into the bread with cracked black peppercorn. It's so hard for me to pace myself and not eat the entire loaf at one time. While you can order Zingerman's bread online, as I've done while living in Indianapolis, this time I got it right from the source. No, I haven't died and gone to heaven, there still is no Zingerman's in rural Ohio. This weekend, I went up to Michigan.

Why? Because my friend Trish and I went to see Mozart's The Marriage of Figaro at the Michigan Opera Theater as a Sunday matinee. It was really good. We go to the opera yearly and we always have a good time. The Marriage of Figaro runs November 10th through the 18th and tickets run as cheap as $25.

Being that I was in town for the weekend it was no problem to invite some friends and family to Drop In & Decorate, Saturday morning. Basically I showed up with 7 dozen cookies and had some icing and sprinkles ready. And my family and friends decorated the cookies. Then another friend of mine helped me drop the cookies at the Ann Arbor Ronald McDonald House. The people were so appreciative. Hosting a party like this is really easy and definitely brightened the day of the Ronald McDonald House people. Follow the link and think about hosting your own party.

While already being in Ann Arbor besides going to Zingerman's we went to the best liquor and cheese store. Morgan and York, formerly known as the Big Ten, or "the cheese cheese cheese liquor store", is in my opinion the greatest place to go and buy cheese and fancy goods. I managed to pick up a Pecorino wrapped in walnut leaves, some cocoa nibs, and some Jasper Hill Cabot Cheddar (possibly the best cheddar I've ever tasted. The staff there is so friendly and helpful, you can't help but leave knowing more about cheese than when you came in. I think it's my favorite place in Ann Arbor. I recommend it highly.

Friday, November 9, 2007

Sweet Dumpling Squash


I am a giant fan of easy. Sometimes a meal I can come home from work and stick in the oven and be done with it is right up my alley. So, when I was grocery shopping and ran across these cute individual sized sweet dumpling squashes, I was hooked almost instantly. OK, I admit, for about 2 seconds I thought ooooooh how cute would these be filled? But instead, I came home from work, cut off the tops, and scooped out the insides. The only filling these got was a pat of butter and some salt and pepper. I then stuck them in the oven for about 35 minutes at 350 degrees. They were perfect next to simple baked chicken.

I love easy.